Tools
Open the Tool Shelf in the 3D View or UV/Image Editor .
Brush
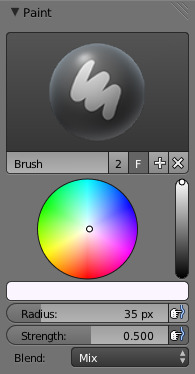
Brush Settings.
With this panel, you can create many brushes, each with unique settings (such as color and width).
Brush Types
Texture Draw
The normal brush; paints a swath of color.
Fill
It can be used to fill the image with the brush color.
- Fill Threshold
- ToDo. (2D only)
Note
Overrides
For projective texturing it will bypass some options for projective painting to paint the model. This means that occluded, backfacing and normal culled faces will always get filled, regardless of whether the options are activated in the projection paint panel.
Tip
Masking
Use the face selection mask to isolate faces.
Mask
The mask feature maps an image to the mesh and uses the image intensity to mask out certain parts of the mesh out during painting. The mask options can be found mask panel in the slots tab.
Soften
Blends edges between two colors.
- Direction
- Soften
- Blur filter. ToDo.
- Sharpen
The sharpen tool enhances the contrast of the image as you paint over it.
- Sharp Threshold
- The Threshold will only apply sharpening to only those pixels that differ more than the threshold value from their surrounding pixels.
- Blur Mode
The blur kernel type controls how neighboring pixels are weighted when calculating the blur effect.
- Gaussian
- Gaussian will sample the pixels near the center of the brush most.
- Box
- Box samples all surrounding pixels equally.
Smear
When you click, takes the colors under the cursor, and blends them in the direction you move the mouse. Similar to the “smudge” tool of Gimp.
Clone
Copies the colors from the image specified to the active image.
The clone cursor can be set with Ctrl-LMB.
In 2D painting the clone can be moved dragging it with RMB.
- Clone from paint slot
The background image is shown when this brush is selected; use the Strength slider to control how prominent the background image is.
- Source Clone Slot
- When using the clone brush, this allows you to select an image as a clone source.
Common
Most brushes have common settings.
- Color
The color of the brush. See Color Picker.
Press
Son any part of the image to sample that color and set it as the brush color.- Flip (cycle icon)
X - Swaps the foreground and background color.
- Flip (cycle icon)
- Radius
- The radius of the brush in pixels.
- Strength
How powerful the brush is when applied.
- Space Attenuation (padlock icon)
- Attenuate the brush strength according to spacing.
- Pressure Sensitivity (hand and bulged in blue line icon)
- The toggle to the right of the following three settings will enable or disable tablet pressure sensitivity to control how strong the effect is.
- Blend
Set the way the paint is applied over the underlying color. See Color Blend Modes.
- Add Alpha: makes the image more opaque where painted.
- Erase Alpha: makes the image transparent where painted, allowing background colors and lower-level textures to show through. As you ‘paint’, the false checkerboard background will be revealed. Using a table pen’s eraser end will toggle on this mode.
- Luminosity
- Exclusion
- Vivid light
- Pin light
Tip
In order to see the effects of the Erase and Add Alpha mix modes in the UV/Image Editor, you must enable the alpha channel display by clicking the Display Alpha or the Alpha-Only button. Transparent (no alpha) areas will then show a checkered background.
- Accumulate
- This will allow a stroke to accumulate on itself, just like an airbrush would do.
- Alpha
- Opacity of the clone image display.
- Use Gradient
A gradient can be used as color source. ToDo. See Color Ramp Widget. To apply the gradient with the Fill brush click
LMBand drag to define depending on the Gradient Fill Mode the gradient line, or radius, if radial gradient is used.- Mode
- Pressure
- Will choose a gradient color from the color band according to the stylus pressure.
- Clamp
- Will alter the color automatically by the distance covered by the brush and as specified. by Gradient spacing. With Clamp it uses the last color of the color band after the specified.
- Repeat
- Similar to Clamp. After the last color it resets the color to the first color in the color band and repeating the pattern.
- Gradient Fill Mode
- Linear, Radial
Tilling
Wraps the stroke to the other side of the image as your brush moves off the opposite side of the canvas. Very handy for making seamless textures.
- X
- left/right
- Y
- top/bottom