Tools
Brush
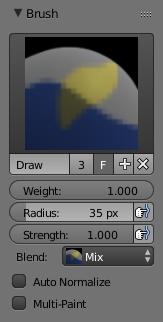
Brush Panel.
Painting needs paint brushes and Blender provides a Brush Panel within the Tool Shelf when it operates in Weight Paint Mode.
- Brush
- In the Data-Block menu you find predefined Brush Presets. And you can create your own custom presets as needed.
- Weight
W The weight (color) to be used by the brush. However, the weight value is applied to the Vertex Group in different ways depending on the selected Brush Blending mode (see below).
Use
Ctrl-LMBto sample the weight value of clicked vertex.Shift-LMBlets you select the group from which to sample from.- Strength
- This is the amount of paint to be applied per brush stroke. What that means exactly also depends on the Brush Blending mode.
- Radius
- The radius defines the area of influence of the brush.
- Blend mode
The brush Blending mode defines in which way the weight value is applied to the Vertex Group while painting.
- Mix
- In this Blending mode the Weight value defines the target weight that will eventually be reached when you paint long enough on the same location of the mesh. And the strength determines how many strokes you need to arrive at the target weight. Note that for strength = 1.0 the target weight is painted immediately, and for Weight = 0.0 the brush just does nothing.
- Add
- In this Blending mode the specified weight value is added to the vertex weights. The strength determines which fraction of the weight gets added per stroke. However, the brush will not paint weight values above 1.0.
- Subtract
- In this Blending mode the specified weight value is subtracted from the vertex weights. The strength determines which fraction of the weight gets removed per stroke. However, the brush will not paint weight values below 0.0.
- Lighten
- In this Blending mode the specified weight value is interpreted as the target weight. Very similar to the Mix Blending mode, but only weights below the target weight are affected. Weights above the target weight remain unchanged.
- Darken
- This Blending mode is very similar to the Lighten Blending mode. But only weights above the target weight are affected. Weights below the target weight remain unchanged.
- Multiply
- Multiplies the vertex weights with the specified weight value. This is somewhat like subtract, but the amount of removed weight is now dependent on the Weight value itself.
- Blur
Smooths out the weighting of adjacent vertices. In this mode the Weight Value is ignored. The strength defines how much the smoothing is applied.
- Accumulate
This option keeps applying smoothing on top of the previous result.
Hint
- Disable when painting individual vertices on lower poly modules.
- Enable for more dense geometry, or when you want to increase the blur effect.
- Auto Normalize
Ensures that all deforming vertex groups add up to one while painting. When this option is turned off, then all weights of a vertex can have any value between 0.0 and 1.0. However, when Vertex Groups are used as Deform Groups for character animation then Blender always interprets the weight values relative to each other. That is, Blender always does a normalization over all deform bones. Hence in practice it is not necessary to maintain a strict normalization and further normalizing weights should not affect animation at all.
This option works most intuitively when used to maintain normalization while painting on top of weights that are already normalized with some other tool.
- Multi-Paint
Paint on all selected Vertex Groups simultaneously, in a way that preserves their relative influence. This can be useful when tweaking weights in an area that is affected by more than three bones at once, e.g. certain areas on a character’s face.
This option is only useful in the Armature tab, where you can select multiple Vertex Groups by selecting multiple Pose bones. Once at least two Vertex Groups are selected, viewport colors and paint logic switch to Multi-Paint Mode, using the sum of the selected groups’ weights if Auto Normalize is enabled, and the average otherwise. Any paint operations aimed at this collective weight are applied to individual Vertex Group weights in such way that their ratio stays the same.
Since the ratio is undefined if all weights are zero, Multi-Paint cannot operate on vertices that do not have any weight assigned to the relevant Vertex Groups. For this reason it also does not allow reducing the weight all the way to zero. When used with X-Mirror, it only guarantees completely a symmetrical result if weights are initially symmetrical.
Tip
While Multi-Paint cannot directly paint on zero-weight vertices, it is possible to use the Smooth Weight tool to copy a reasonable non-zero weight distribution from adjacent vertices without leaving Multi-Paint Mode or changing bone selection.
To do that, enable vertex selection, select target vertices, and apply one iteration of the tool using vertex groups from Selected Pose Bones with low Factor. After that simply paint on top to set the desired collective weight.