Editing & Selecting
Editing text is quite different from other object types in Blender, and happens mainly in two areas. First, the 3D View, of course, where you type your text, and have a few shortcuts, e.g. for applying styles (see Character) – note however, that most Blender hotkeys you know in Edit Mode do not exist for texts. The second place is the Properties Editor, especially the Font tab.
Text in Edit Mode.
The menu of the 3D View header offers few options, and there is no Specials menu... You have no transform nor mirror tools, and so on. However, you can apply to texts the same modifiers as for curves.
Basic Editing
Editing Text is similar to using a standard text editor but is not as full-featured and has some differences:
- Exit Edit Mode
Tabdoes not insert a tab character in the text, but rather enters and exits Edit Mode, as with other object types.- Copy
- To copy text to the buffer, use
Ctrl-Cor the Copy button in the tool shelf. - Cut and Copy
- To cut and copy text to the buffer, use
Ctrl-Xor the Cut button in the tool shelf. - Paste
- To paste text from the buffer, use
Ctrl-Vor the Paste button in the tool shelf. - Delete all text
- To completely erase or delete all text, use
Ctrl-Backspace.
The text buffer is in sync with the desktop clipboard. But if it is used within Blender the text formatting will be copied as well. For other ways of inserting a text, see Inserting Text below.
Special Characters
Reference
If you need special characters (such as accented chars, which are not on your keyboard)
you can produce many of them using a combination of two other characters. To do so,
type the main char, press Alt-Backspace,
and then press the desired “modifier” to produce the special character.
Some examples are given below:
| ã | A, Alt-Backspace, ~ |
| á | A, Alt-Backspace, ' |
| à | A, Alt-Backspace, \ |
| å | A, Alt-Backspace, O |
| ë | E, Alt-Backspace, " |
| ø | O, Alt-Backspace, / |
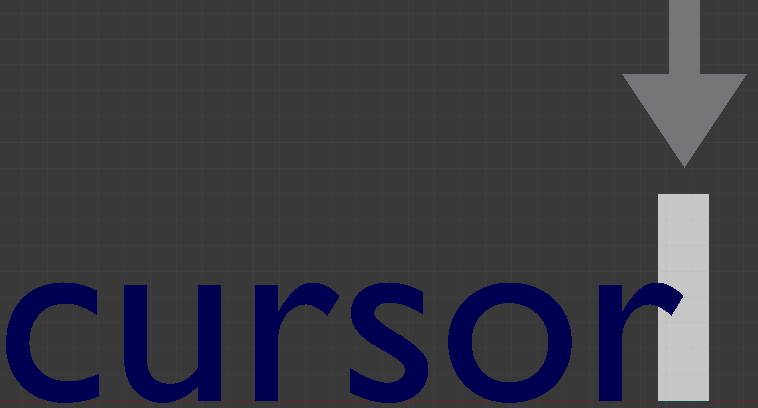
Cursor & Selection
Text in Edit Mode.
In Edit Mode, your text has a white cursor, and as in any text editor, it determines where new chars will be inserted.
- Next/Previous Character
- You can move the cursor with the arrow keys
LeftorRight. - Next/Previous Word
- To move the cursor on a word’s boundary, use
Ctrl-LeftorCtrl-Right. - Line Begin/End
HomeandEndmove the cursor to the beginning and end of a line respectively.- Next/Previous Line
- To jump between lines use
UporDown. - Next/Previous Page
- To jump back/forward ten lines at a time use
PageUporPageDown.
Hold Shift while using the arrow keys to select a part of the text.
You can use it to specify different materials, the normal/bold/italic style,
and not much more...
Inserting Text
You can insert text in two ways: from the internal text buffer (as described above), or from a text file.
To load text from a text file, use the tool. This will bring up a File Browser for navigating to a valid UTF-8 file. As usual, be careful that the file does not have too many characters, as interactive response will slow down.
Converting Text Objects
Converting to Text Object
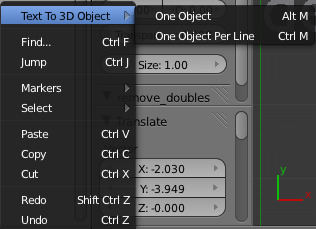
Using an existing text-block, you can convert it to an object from the text editor’s header, select , One Object or One Object per Line depending on your needs.
It is also possible to paste from the clipboard or a file from the Edit menu, while editing 3D Text.
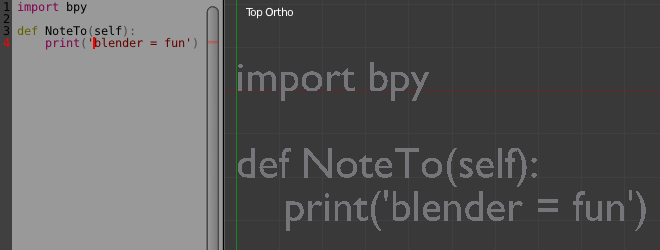
Converting to 3D Mesh
It is possible to convert a Text Object to a 3D Mesh object.
This can be useful so that you may edit the vertices in Edit Mode,
but you will lose the ability to edit the text itself.
To do this, go to Object Mode and select your Text Object.
Press Alt-C and select Mesh From Curve/Meta/Surf/Text.
Now you can return to Edit Mode and manually edit the vertices.
They are usually a bit messy, so it may be useful to use a Limited Dissolve deletion or Remesh Object
Modifier at a low threshold to clean up your mesh.
left normal text, right the made text object.
Assigning Materials
Reference
Each character can have a different Material index in order to have different materials on different characters.
You can assign indices either as you type, or after by selecting blocks of text and clicking on the Assign button in the Materials panel.

Red Green Blue.
For example, to create Fig. Red Green Blue. you would need to create three separate materials and three separate material indices. Each word would be assigned a Material index by selecting the characters for each word and clicking the Assign button. Fig. Red Green Blue. is still one single Text object.