Add-ons
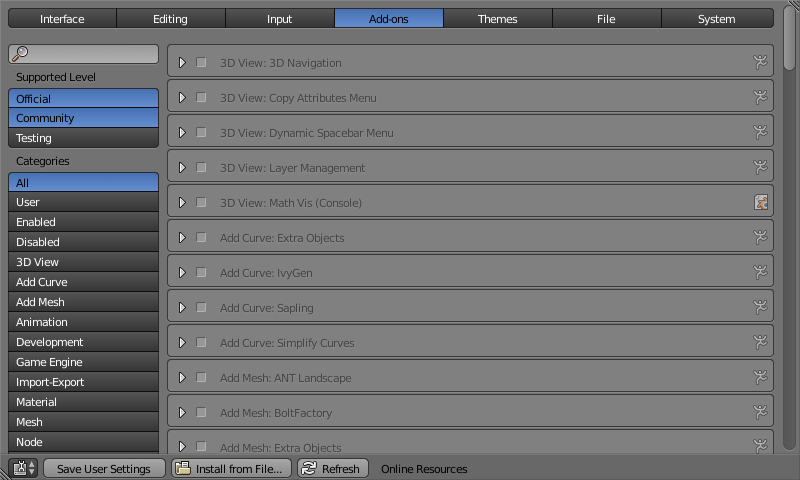
The Add-ons tab lets you manage secondary scripts, called “Add-ons” that extends Blender’s functionality. In this tab you can search, install, enable and disable Add-ons.

Add-ons tab in the User Preferences.
Searching
Blender comes with some useful Add-ons already, ready to be enabled. But you can also add your own, or any interesting ones you find on the web.
Filtering
- Supported Level
Blender’s add-ons are split into two groups depending on who writes/supports them:
- Official: Add-ons that are written by Blender developers.
- Community: Add-ons that are written by people in the Blender community.
- Categories
- Add-ons are divided into categories by what areas of Blender they affect.
Enabling and Disabling
Enable and disable an add-on by checking or unchecking the box on the right of the add-on you chose, as shown in the figure.

Enabling an Add-on.
The add-on functionality should be immediately available. If the Add-on does not activate when enabled, check the Console window for any errors, that may have occurred.
Add-on Information
You can click the arrow at the left of the add-on box to see more information, such as its location, a description and a link to the documentation. Here you can also find a button to report a bug specific of this add-on.
Tip
Saving Add-on Preferences
If you want an Add-on to be enabled every time you start Blender, you will need to Save User Settings.
Add-on Preferences
Individual Activation
Add-ons that activate or change multiple hotkeys now have a special system of activation. For example, with the “UI: Pie Menu Official” add-on for each menu there’s a selection box to activate the menu and its hotkey.
With Pie menus, First you activate the add-on. This activates the “Add-ons Preferences Submodule Activation”. You then need to expand the Add-ons Preferences, then you will see the list of Pie Menu types you can choose from. From here you can individually activate the menus you like to use. If the menu conflicts with another favorite, there’s no need to activate it. You can activate any combination & save as user settings so your activation are available next time you start Blender.
Header
- Install from File
For add-ons that you found on the web or your own to show on the list, you have to install them first by clicking Install from File... and providing a
.zipor.pyfile.Now the add-on will be installed, not automatically enabled. The search field will be set to the add-on’s name (to avoid having to look for it). Enable the add-on by turning on the check-box.
- Refresh
- Scans the Add-on Directory for new add-ons.
- Online Resources
This menu contains a list of helpful links for both users and people who are interested in writing their own add-on.
- Scripts Catalog
- Provides an index of Add-ons that are included with Blender as well as listing a number of external Add-ons.
- How to share your add-on
- Information on how to get your add-on into Blender.
- Add-ons development guidelines
- Guidelines on writing new add-on that you might want to get into Blender.
- API Concepts
- A quick introduction to Blender’s API.
- Add-on Tutorial
- A quick tutorial on the essentials of writing an add-on.
Tip
User Defined Add-on Path
You can also create a personal directory containing new add-ons and configure your files path in the File tab of the User Preferences. To create a personal script directory:
- Create an empty directory in a location of your choice (e.g.
my_scripts). - Add a subdirectory under
my_scriptscalledaddons(it must have this name for Blender to recognize it). - Open the File tab of the User Preferences.
- Set the Scripts in the User Preferences to point to your script directory (e.g.
my_scripts). - Save the User Preferences and restart Blender for it to recognize the new add-ons location.
Now when you install add-ons you can select the Target Path option to User Pref (from the File tab).
Blender will copy newly installed add-ons under the directory selected in your User Preferences.