Lattice Modifier
The Lattice modifier deforms the base object according to the shape of a Lattice object. Objects to be deformed can be meshes, curves, surfaces, text, lattices and even particles.
Tip
A Lattice Modifier can quickly be added to selected objects by selecting them all,
then selecting the lattice object last and pressing Ctrl-P and choosing Lattice Deform.
This will both add Lattice Modifiers to the selected objects and parent them to the lattice.
Options

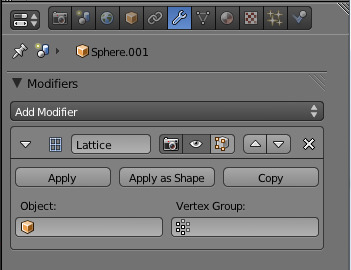
Lattice Modifier.
- Object
- The Lattice object with which to deform the base object.
- Vertex Group
- An optional vertex group name which lets you limit the modifier effect to a part of the base mesh.
- Strength
- A factor to control blending between original and deformed vertex positions.
Hints
Why would you use a lattice to deform a mesh instead of deforming the mesh itself in Edit Mode ? There are a couple of reasons for that:
- If your object has a large number of vertices, it would be difficult to edit portions of it quickly in Edit Mode. Using a lattice will allow you to deform large portions efficiently.
- The smooth deformation you get from a Lattice Modifier can be hard to achieve manually in Edit Mode.
- Multiple objects can use the same lattice, thus allowing you to edit multiple objects at once.
- Like all modifiers, it is non-destructive. Meaning all changes happen on top of the original geometry, which you can still go back and edit without affecting the deformation.
- A lattice does not affect the texture coordinates of a mesh’s surface.
Note
When using a lattice to deform particles, always remember to place the Lattice Modifier after the Particle System Modifier. Read more about the importance of the modifier stack Here.