Parenting Objects
Reference
Ctrl-PWhen modeling a complex object, such as a watch, you may choose to model the different parts as separate objects. However, all of the parts may be attached to each other. In these cases, you want to designate one object as the parent of all the children. Movement, rotation or scaling of the parent also affects the children.
To parent objects, select at least two objects (select the Child Objects first,
and select the Parent Object last), and press Ctrl-P. The Set Parent To
menu will pop up allowing you to select from one of several possible different
parenting types. Selecting one of the entries in Set Parent To confirms,
and the child/children to parent relationship is created.
The last object selected will be the Active Object (outlined in light orange), and will also be the Parent Object. If you selected multiple objects before selecting the parent, they will all be children of the parent and will be at the same level of the hierarchy (they are “siblings”).
The Set Parent To pop-up menu is context sensitive, which means the number of entries it
displays can change depending on what objects are selected when the Ctrl-P
shortcut is used.
For non-inverse-mode, press Shift-Ctrl-P instead. This creates an alternative
parent-child-relationship where child-objects exist entirely in the parent’s coordinate
system. This is the better choice for CAD purposes, for example.
Moving, rotating or scaling the parent will also usually move/rotate/scale the child/children. However, moving/rotating/scaling the child/children of the parent will not result in the parent moving/rotating/scaling. In other words, the direction of influence is from parent to child and not child to parent.
In general when using Ctrl-P or
to parent objects, the Child Objects can only have one Parent Object.
If a Child Object already has a Parent Object and you give it another parent then
Blender will remove the previous parent relationship.
Blender supports many different types of parenting, listed below:
- Object
- Bone
- Vertex
- Vertex (Triangle)
Setups
Besides parenting the selected objects, it adds a Modifier or Constraint to the child objects, with the parent as target object or activates a parent property i.e. Follow Path.
Object Parent
Object Parent is the most general form of parenting that Blender supports. If will take selected objects and make the last selected object the Parent Object, while all other selected objects will be Child Objects. The child objects will inherit the transformations of the parent. The parent object can be of any type.
Object (Keep Transform) Parent
Object (Keep Transform) Parent works in a very similar way to Object Parent the major difference is in whether the Child Objects will remember any previous transformations applied to them from the previous Parent Object.
Since explaining this in an easy to understand technical way is hard, lets instead use an example to demonstrate.
Assume that we have a scene consisting of three objects, those being two Empty Objects named “EmptyA” and “EmptyB”, and a Monkey object. Fig. Scene with no parenting. shows the three objects with no parenting relationships active on them.
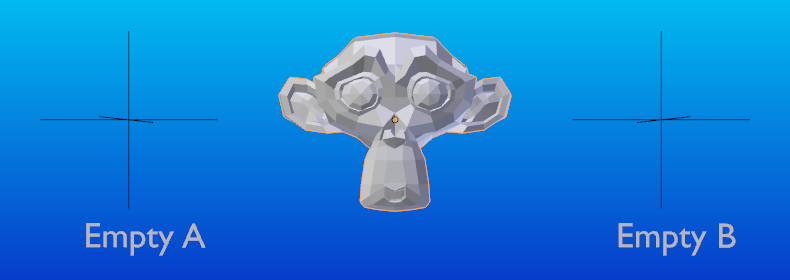
Scene with no parenting.
If you select the Monkey object by RMB click and then Shift-RMB
click “EmptyA” object and press Ctrl-P and then select Object from the
Set Parent To pop-up menu.
This will result in “EmptyA” object being the Parent Object of the Monkey object. With
only “EmptyA” selected rotating/scaling/moving it will result in the Monkey object being
altered respectively.
Scale the “EmptyA” object, so that the Monkey becomes smaller and moves to the left a little.
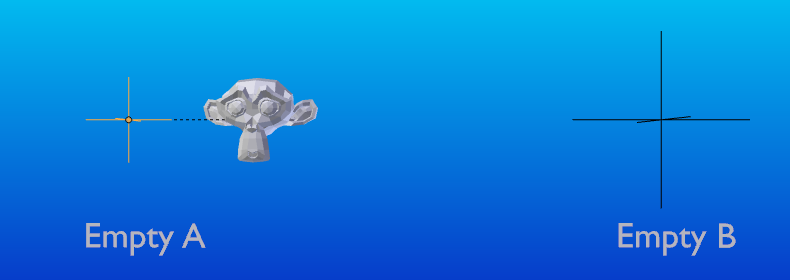
The monkey is the child object of “EmptyA”.
If you select only the Monkey object by RMB click and then Shift-RMB
click “EmptyB” object and press Ctrl-P and select Object from
the Set Parent To pop-up menu.
This will result in “EmptyB” object being the Parent Object of the Monkey object.
Notice that when you change the parent of the Monkey the scale of the Monkey changed.
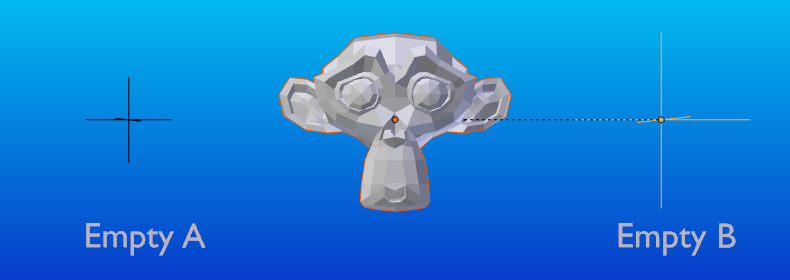
The monkey is the child object of “EmptyB”.
This happens because the Monkey object never had its scale altered directly, the change came about because it was the child of “EmptyA” which had its scale altered. Changing the Monkey’s parent to “EmptyB” resulted in those indirect changes in scale being removed, because “EmptyB” has not had its scale altered.
This is often the required behavior, but it is also sometimes useful that if you change your Parent Object that the Child Object keep any previous transformations it got from the old Parent Object; If instead when changing the Parent Object of the Monkey from “EmptyA” to “EmptyB” we had chosen parenting type Object (Keep Transform), the Monkey would keep its scale information it obtained from the old parent “EmptyA” when it is assigned to the new parent “EmptyB”;

The Object (Keep Transform) parent method.
If you want to follow along with the above description here is the blend-file used to describe Object (Keep Transform) parenting method:
Bone Parent
Bone parenting allows you to make a certain bone in an armature the Parent Object of another object. This means that when transforming an armature the Child Object will only move if the specific bone it is the Child Object of moves.
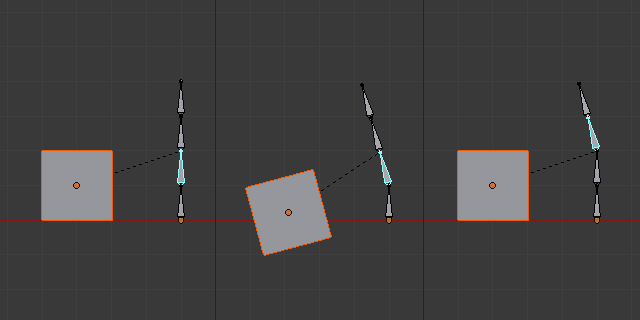
Three pictures of Armatures with four Bones.
In Fig. Three pictures of Armatures with four Bones. with the 2nd bone being the Bone Parent of the Child Object Cube. The Cube is only transformed if the 1st or 2nd bones are. Notice altering the 3rd and 4th bones has no effect on the Cone.
To use Bone Parenting, you must first select all the Child Objects you wish to parent to a specific Armature Bone,
then Shift-RMB select the Armature Object and switch it into Pose Mode and then select the
specific bone you wish to be the Parent Bone by RMB selecting it.
Once done press Ctrl-P and select Bone from the Set Parent To pop-up menu.
Now transforming that bone in Pose Mode will result in the Child Objects also transforming.
Relative Parenting
Bone Relative parenting is an option you can toggle for each bone. This works in the same way as Bone parenting with one difference.
With Bone parenting if you have parented a bone to some Child Objects and you select that bone and switch it into Edit Mode and then translate that bone; When you switch back into Pose Mode on that bone, the Child Object which is parented to that bone will snap back to the location of the bone in Pose Mode.
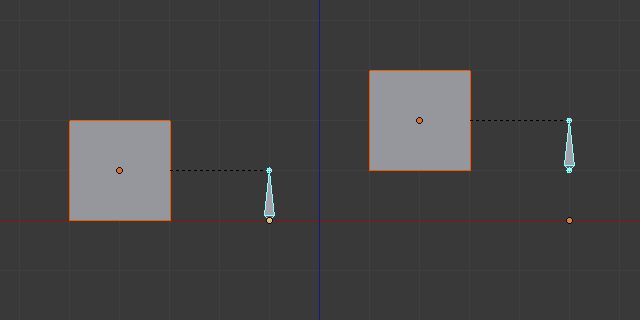
Single Armature Bone which has a Child Object cube parented to it using Bone parenting.
In Fig. Single Armature Bone which has a Child Object cube parented to it using Bone parenting. the 1st picture shows the position of the cube and armature before the bone is moved in Edit Mode. 2nd picture shows the position of the cube and armature after the bone was selected in Edit Mode, moved and switched back into Pose Mode. Notice that the Child Object moves to the new location of the Pose Bone.
Bone Relative parenting works differently; If you move a Parent Bone in Edit Mode, when you switch back to Pose Mode, the Child Objects will not move to the new location of the Pose Bone.
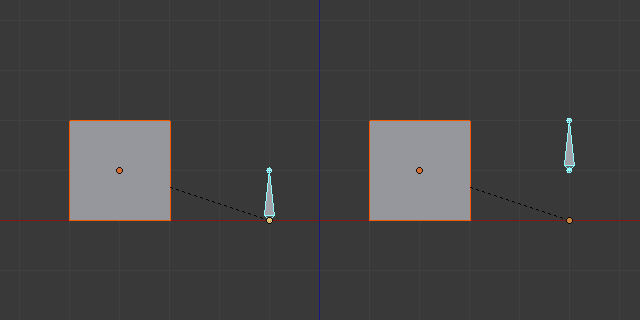
Single Bone with Bone Relative parent to a cube.
In Fig. Single Bone with Bone Relative parent to a cube. the 1st picture shows the position of the cube and armature before the bone is moved in Edit Mode. 2nd picture shows the position of the cube and armature after the bone was selected in Edit Mode, moved and switched back into Pose Mode. Notice that the Child Object does not move to the new location of the Pose Bone.
Vertex Parent
For objects of type curve, surface, mesh and lattice, there is the possibility to use one of its vertices or points as the parent of other objects. You can parent an object to a single vertex or a group of three vertices as well; that way the child/children will move when the parent mesh is deformed, like a mosquito on a pulsing artery.
Vertex Parent from Edit Mode
In Object Mode, select the child/children and then the parent object.
Tab into Edit Mode and on the parent object select either one vertex
that defines a single point, or select three vertices that define an area
(the three vertices do not have to form a complete face;
they can be any three vertices of the parent object),
and then press Ctrl-P and confirm.
At this point, if a single vertex was selected, a relationship/parenting line will be drawn from the vertex to the child/children. If three vertices were selected then a relationship/parenting line is drawn from the averaged center of the three points (of the parent object) to the child/children. Now, as the parent mesh deforms and the chosen parent vertex/vertices move, the child/children will move as well.
Vertex Parent from Object Mode
Vertex parenting can be performed from object mode,
This is done like regular object parenting,
Press Ctrl-P in object mode and select Vertex or Vertex (Triangle).
The nearest vertices will be used from each object which is typically what you would want.
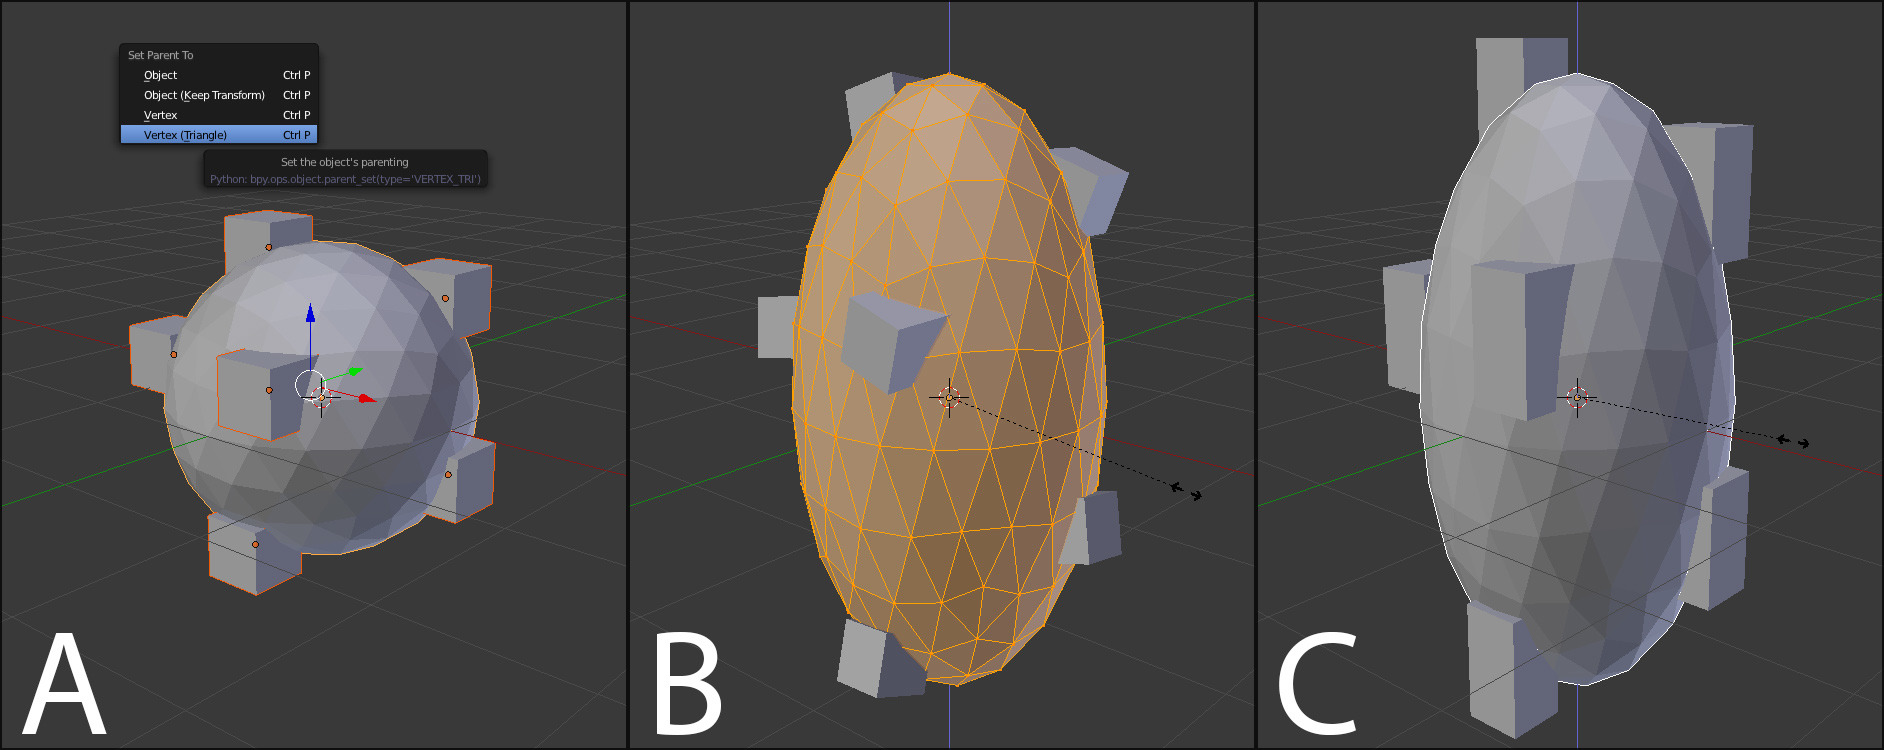
Vertex Parent example.
- The small cubes can each be automatically parented to a triad of nearby vertices on the icosphere using the “Vertex (Triangle)” in the set parent context menu.
- Reshaping the object in edit mode then means each of the cubes follows their vertex parent separately.
- Re-scaling the parent icosphere in object mode means the child cubes are also rescaled as expected.
The parent context menu item means users can rapidly set up a large number of vertex parent relationships, and avoid the tedious effort of establishing each parent-child vertex relationship separately.
Note
It is in fact a sort of “reversed” hook
Options
Move child
You can move a child object to its parent by clearing its origin.
The relationship between the parent and child is not affected.
Select the child object and press Alt-O.
By confirming the child object will snap to the parent’s location.
Use the Outliner view to verify that the child object is still parented.
Clear Parent
Reference
Alt-PYou can remove a parent-child relationship via Alt-P
The menu contains:
- Clear Parent
- If the parent in the group is selected nothing is done. If a child or children are selected they are disassociated from the parent, or freed, and they return to their original location, rotation, and size.
- Clear and Keep Transformation
- Frees the children from the parent, and keeps the location, rotation, and size given to them by the parent.
- Clear Parent Inverse
Places the children with respect to the parent as if they were placed in the Global reference. This effectively clears the parent’s transformation from the children. The hierarchical relationships are not removed, but the correcting matrix (‘’parent inverse’‘) is cleared from the selected objects.
For example, if the parent is moved 10 units along the X axis and Clear Parent Inverse is invoked, any selected children are freed and moved -10 units back along the X axis. The “Inverse” only uses the last transformation; if the parent moved twice, 10 units each time for a total of 20 units, then the “Inverse” will only move the child back 10 units, not 20.
Hints
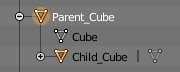
Outliner view.
There is another way to see the parent-child relationship in groups and that is to use the Outliner view of the Outliner editor. Fig. Outliner view. is an example of what the Outliner view looks like for the figurers in the Object Parent example. Cube A’s object name is “Cube_Parent” and cube B is “Cube_Child”.