Introduction
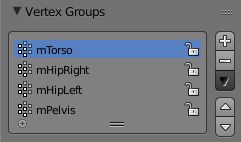
The Vertex Group Panel.
Vertex Groups are mainly used to tag the vertices belonging to parts of a Mesh Object or Lattice. Think of the legs of a chair or the hinges of a door, or hands, arms, limbs, head, feet, etc. of a character. In addition you can assign different weight values (in the range [ 0.0, 1.0 ] ) to the vertices within a Vertex Group. Hence Vertex Groups are sometimes also named Weight Groups.
Vertex Groups are most commonly used for Armatures (See also Skinning Mesh Objects). But they are also used in many other areas of Blender, like for example:
- Shape keys
- Modifiers
- Particle Generators
- Physics Simulations
Many more usage scenarios are possible. Actually you can use Vertex Groups for whatever makes sense to you. In some contexts Vertex Groups can also be automatically generated (e.g. for rigged objects). However, in this section we will focus on manually created (user-defined) Vertex Groups.
Note
Vertex groups only apply to Mesh and Lattice Objects
Any other Object type has no vertices, hence it cannot have Vertex Groups.
Usage
Typical use cases for vertex groups.
Skinning an Armature
If you want to animate your mesh and make it move, you will define an armature which consists of a bunch of bones. Vertex Groups are used to associate parts of the Mesh to Bones of the Armature, where you can specify an influence weight in the range (0.0 - 1.0) for each vertex in the Vertex Group.
Obviously, the same vertex can belong to several groups, and hence be affected by several bones, with a fine tuning of each bone’s influence using these vertex weights. Quite useful when you want to have a smooth joint. For example, when you skin an elbow, the upperarm vertex group contains the vertices of this part at full weight (1.0), and when reaching the elbow area, these weights decrease progressively to 0.0 when reaching the forearm zone and vice versa for the forearm group weights... Of course, this is a very raw example skinning a realistic joint is a big job, as you have to carefully find good weights for each vertex, to have the most realistic behavior, when bending – and this is not an easy thing!
Modifiers
Many modifiers contain the ability to control the modifier influence on each vertex separately. This is also done via Vertex Groups and the weight values associated to the vertices.
Mesh Selection
By defining mesh regions with Vertex Groups you can easily select entire parts of your mesh with three clicks and work on them in isolation without having to create separate objects. With the hide function you can even remove a vertex group from the view (for later unhide).