Render Baking
Baking, in general, is the act of pre-computing something in order to speed up some other process later down the line. Rendering from scratch takes a lot of time depending on the options you choose. Therefore, Blender allows you to “bake” some parts of the render ahead of time, for select objects. Then, when you press Render, the entire scene is rendered much faster, since the colors of those objects do not have to be recomputed.
Render baking creates 2D bitmap images of a mesh object’s rendered surface. These images can be re-mapped onto the object using the object’s UV coordinates. Baking is done for each individual mesh, and can only be done if that mesh has been UV-unwrapped. While it takes time to set up and perform, it saves render time. If you are rendering a long animation, the time spent baking can be much less than time spent rendering out each frame of a long animation.
Use Render Bake in intensive light/shadow solutions, such as AO or soft shadows from area lights. If you bake AO for the main objects, you will not have to enable it for the full render, saving render time.
Use Full Render or Textures to create an image texture; baked procedural textures can be used as a starting point for further texture painting. Use Normals to make a low-resolution mesh look like a high-resolution mesh. To do that, UV-unwrap a high-resolution, finely sculpted mesh and bake its normals. Save that normal map, and Mapping (texture settings) the UV of a similarly unwrapped low-resolution mesh. The low-resolution mesh will look just like the high-resolution, but will have much fewer faces/polygons.
Advantages
- Can significantly reduce render times.
- Texture painting made easier.
- Reduced polygon count.
- Repeated renders are made faster, multiplying the time savings.
Disadvantages
- Object must be UV-unwrapped.
- If shadows are baked, lights and object cannot move with respect to each other.
- Large textures (e.g. 4096×4096) can be memory intensive, and be just as slow as the rendered solution.
- Human (labor) time must be spent unwrapping and baking and saving files and applying the textures to a channel.
Options
Bake Mode
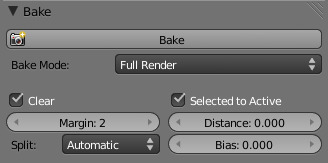
Full Render
Bakes all materials, textures, and lighting except specularity and SSS.
Ambient Occlusion
Bakes ambient occlusion as specified in the World panels. Ignores all lights in the scene.
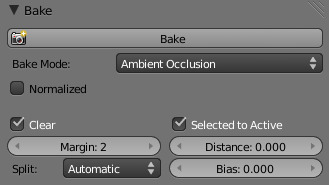
Ambient Occlusion.
- Normalized
- Normalize without using material’s settings.
Shadow
Bakes shadows and lighting.
Normals
Bakes tangent and camera-space normals (amongst many others) to an RGB image.
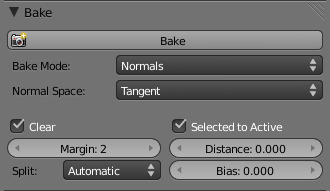
Normals.
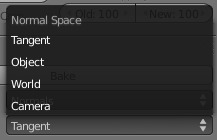
Normal Space.
- Normal Space
Normals can be baked in different spaces:
- Camera space
- Default method.
- World space
- Normals in world coordinates, dependent on object transformation and deformation.
- Object space
- Normals in object coordinates, independent of object transformation, but dependent on deformation.
- Tangent space
- Normals in tangent space coordinates, independent of object transformation and deformation. This is the new default, and the right choice in most cases, since then the normal map can be used for animated objects too.
For materials the same spaces can be chosen as well, in the image texture options, next to the existing Normal Map setting. For correct results, the setting here should match the setting used for baking.
Textures
Bakes colors of materials and textures only, without shading.
Displacement
Similar to baking normal maps, displacement maps can also be baked from a high-res object to an unwrapped low-res object, using the Selected to Active option.
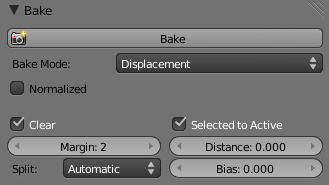
Displacement.
- Normalized
- Normalize to the distance.
When using this in conjunction with a Subdivision Surface and Displacement modifiers within Blender, it is necessary to temporarily add a heavy Subdivision Surface Modifier to the ‘low res’ model before baking. This means that if you then use a Displacement Modifier on top of the Subdivision Surface, the displacement will be correct, since it is stored as a relative difference to the subdivided geometry, rather than the original base mesh (which can get distorted significantly by a Subdivision Surface). The higher the render subdivision level while baking, the more accurate the displacements will be. This technique may also be useful when saving the displacement map out for use in external renderers.
Emission
Bakes Emit, or the Glow color of a material.
Alpha
Bakes Alpha values, or transparency of a material.
Mirror Color and Intensity
Bakes Mirror color or intensity values.
Additional Options
- Clear
- If selected, clears the image to selected background color (default is black) before baking render.
- Margin
- Baked result is extended this many pixels beyond the border of each UV “island,” to soften seams in the texture.
- Split
- Fixed
- Slit quads predictably (0, 1, 2) (0, 2, 3).
- Fixed alternate
- Slit quads predictably (1, 2, 3) (1, 3, 0).
- Automatic
- Split quads to give the least distortion while baking.
- Select to Active
Enable information from other objects to be baked onto the active object.
- Distance
- Controls how far a point on another object can be away from the point on the active object. Only needed for Selected to Active. A typical use case is to make a detailed, high poly object, and then bake its normals onto an object with a low polygon count. The resulting normal map can then be applied to make the low poly object look more detailed.
- Bias
- Bias towards further away from the object (in Blender units)
Note
Mesh Must be Visible in Render
If a mesh is not visible in regular render, for example because it is disabled for rendering in the Outliner or has the DupliVerts setting enabled, it cannot be baked to.
Workflow
- In a 3D View editor, select a mesh and enter UV/Face Select mode
- Unwrap the mesh object
- In a UV/Image Editor, either create a new image or open an existing one. If your 3D View is in textured display mode, you should now see the image mapped to your mesh. Ensure that all faces are selected.
- In the Bake panel at the bottom of the Render menu, bake your desired type of image (Full Render etcetera.)
- When rendering is complete, Blender replaces the image with the Baked image.
- Save the image.
- Apply the image to the mesh as a UV texture. For displacement and normal maps, refer to Bump and Normal Maps. For full and texture bakes, refer to Textures.
- Refine the image using the process described below, or embellish with Texture Paint or an external image editor.
