Bendy Bones
Bendy Bones (B-Bones) are an easy way to replace long chains of many small rigid bones. A common use case for curve bones is to model spine columns or facial bones.
Technical Details
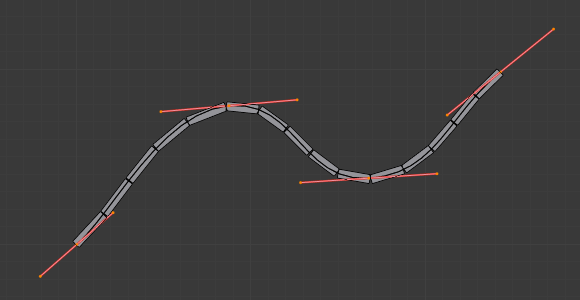
Blender treats the bone as a section of a Bézier curve passing through the bones’ joints. Each Segments will bend and roll the to follow this invisible curve representing a tessellated point of the Bézier curve. The control points at each end of the curve are the endpoints of the bone. The shape of the B-Bones can be controlled using a series of properties or indirectly through the neighboring bones (i.e. first child and parent). The properties construct handles on either end of the bone to control the curvature.
When using the B-bone as a constraint target Data ID offers an option to follow the curvature.
Note
However, if the bone is used as an target rather than to deform geometry, the roll is not taken in account.
Display
You can see these segments only if bones are visualized as B-bones.
When not visualized as B-Bone s, bones are always shown as rigid sticks, even though the bone segments are still present and effective. This means that even in e.g. Octahedron visualization, if some bones in a chain have several segments, they will nonetheless smoothly deform their geometry...
Rest Pose
The initial shape of a B-Bone can be defined in Edit Mode as a rest pose of that bone. This is useful for curved facial features like curved eyebrows or mouths.
B-Bones have two sets of the Bendy Bone properties – one for Edit mode (i.e. the Rest Pose/Base Rig) and another for Pose Mode – adding together their values to get the final transforms.
Example
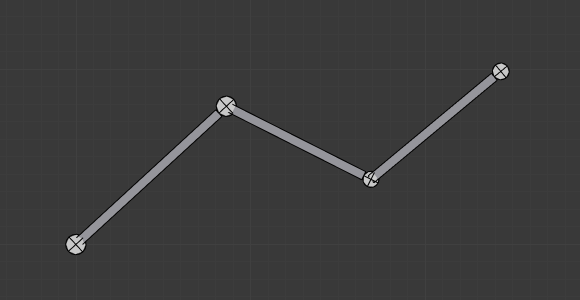
In Fig. The OLD B-Bones, in Edit Mode. ToDo. we connected three bones, each one made of five segments.
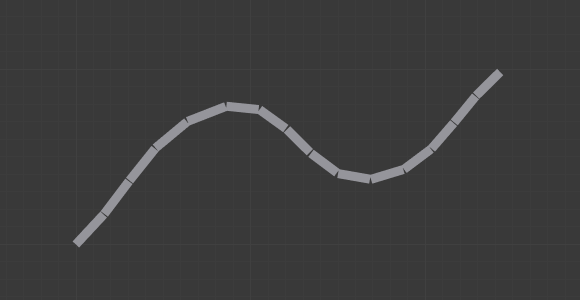
Look at Fig. The same armature in Object Mode., we can see how the bones’ segments smoothly “blend” into each other, even for roll.
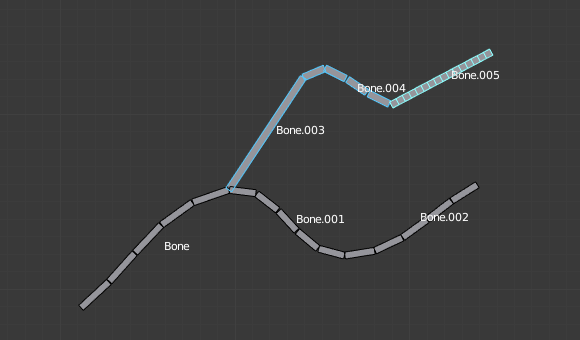
An armature in Pose Mode, B-Bone visualization: Bone.003 has one segment, Bone.004 has four, and Bone.005 has sixteen.
Options
Segments
The Segments number button allows you to set the number of segments, which the given bone is subdivided into. Segments are small, rigid linked child bones that interpolate between the root and the tip. The higher this setting, the smoother “bends” the bone, but the heavier the pose calculations...
Curve XY Offsets
Applies an offsets the curve handle positions on the plane perpendicular to the bone’s primary (Y) axis. As a result, the handle moves per-axis (XY) further from its original location, causing the curve to bend.
Roll
- Roll In, Out
- The roll value (or twisting around the main Y axis of the bone) is interpolated per-segment, between the start and end roll values. It is applied as a rotational offsets on top of the previous rotation.
- Inherit End Roll
- ToDo.
Scale
- Scale In, Out
- Scaling factor that adjusts the thickness of each segment for X and Z axes only, i.e. length is not affected. Similar to Roll it is interpolated per-segment.
Easing
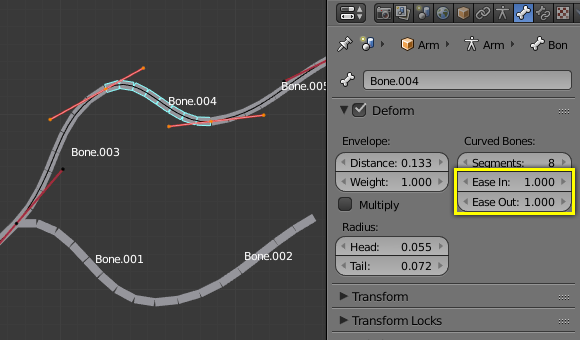
- Ease In, Out
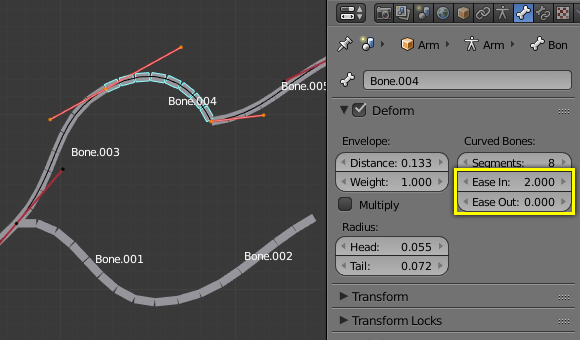
The Ease In/Out number buttons, change the “length” of the “auto” Bézier handle to control the “root handle” and “tip handle” of the bone, respectively.
These values are proportional to the default length, which of course automatically varies depending on bone length, angle with the handle reference, and so on.
Custom Handle Reference
B-Bones can use custom bones as their reference bone handles, instead of only using the parent/child bones. To do so, enable the Use Custom Reference Handles toggle in Pose Mode. If none are specified, then the BBone will only use the Bendy Bone properties. When the option is on, just use the specified bones instead of using trying looking at the bone’s neighbors.
- Relative
- Instead of using the endpoints of the bones as absolute points in 3D space it computes how far the reference bone has moved away from its rest pose. The delta transformation is then applied as to the bone’s own endpoints to get the handle locations. This is useful if the custom control bone is far away from its target.
Tip
Keying Set
The “BBone Shape” Keying Set includes all Bendy Bones properties.
Example
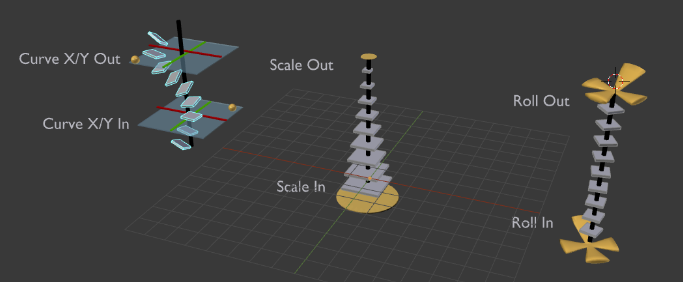
Visualization of the Bendy Bones properties.
