Warp
Reference

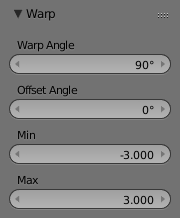
Warp tool options.
In Edit Mode, the Warp transformation takes selected elements and warps them around the 3D cursor by a certain angle. Note that this transformation is always dependent on the location of the 3D cursor. The Pivot Point is not taken into account. The results of the Warp transformation are also view dependent.
In Object Mode, the Warp transformation takes the selected Objects and causes them to move in an orbit-like fashion around the 3D cursor. Similar to Edit Mode, the Pivot Point is not taken into account and the results are view dependent.
Usage

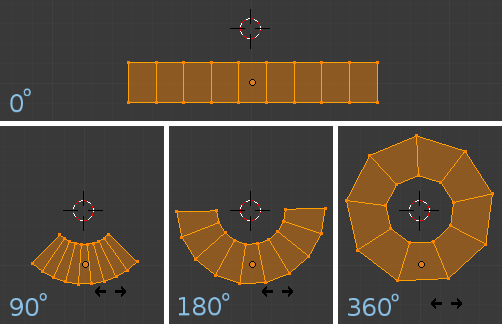
In this example, a plane is warped around the 3D cursor by the indicated number of degrees.
Select the elements you want to operate on and activate the Warp transform function.
The Warp option can be invoked from the
menu option.
The amount of warping given to the selection can be determined
interactively by moving the mouse or by typing a number. Pressing Return
will confirm the transformation. The confirmed transformation can
be further edited by pressing F6 or by going into the Tool Shelf
and altering the Angle slider provided that no other actions take place between the
Warp transform confirmation and accessing the slider.
Cursor position and view
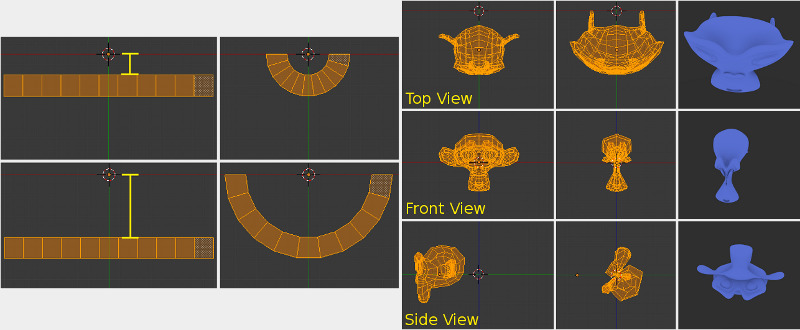
The location of the 3D cursor can be used to alter the results of the Warp transformation. As can be seen from the example in this section, the Warp radius is dependent on the distance of the cursor from the selected elements. The greater the distance, the greater the radius.
The result of the Warp transform is also influenced by your current view. The example in this section shows the results of a 180 degree Warp transform applied to the same Suzanne mesh when in different views. A 3D render is also provided for comparison.

The left side of this image shows how the Warp transform is influenced by the location of the cursor. The right hand side shows the influence of the current view.
Note
Warping text
If you want to warp text, you will need to convert it from a Text Object to Mesh
by pressing Alt-C and selecting the Mesh from Curve/Meta/Surf/Text option.
Example

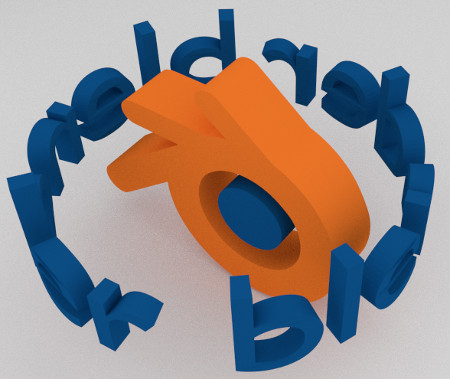
Text wrapped around logo.
This was made by creating the Blender logo and text as separate Objects. The text was converted to a mesh and then warped around the Blender logo.