Smoothing
Mesh Shading
|

|

|
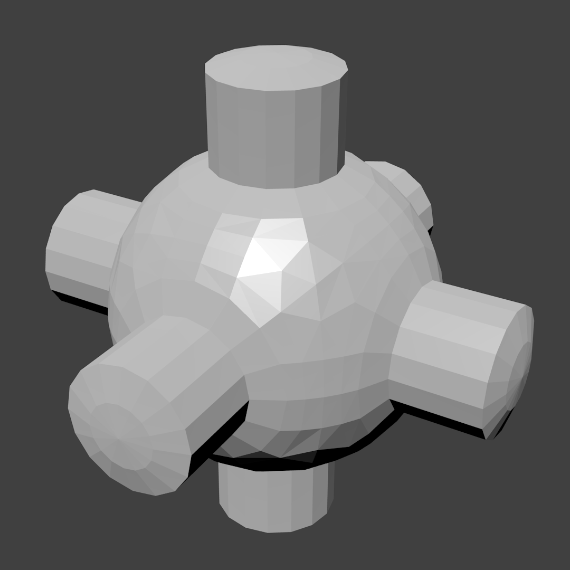
As seen in the previous sections, polygons are central to Blender. Most objects are represented by polygons and truly curved objects are often approximated by polygon meshes. When rendering images, you may notice that these polygons appear as a series of small, flat faces.
Sometimes this is a desirable effect, but usually we want our objects to look nice and smooth. This section shows you how to visually smooth an object, and how to apply the Auto Smooth filter to quickly and easily combine smooth and faceted polygons in the same object.
The last section on this page shows possibilities for smoothing a mesh’s geometry, not only its appearance.
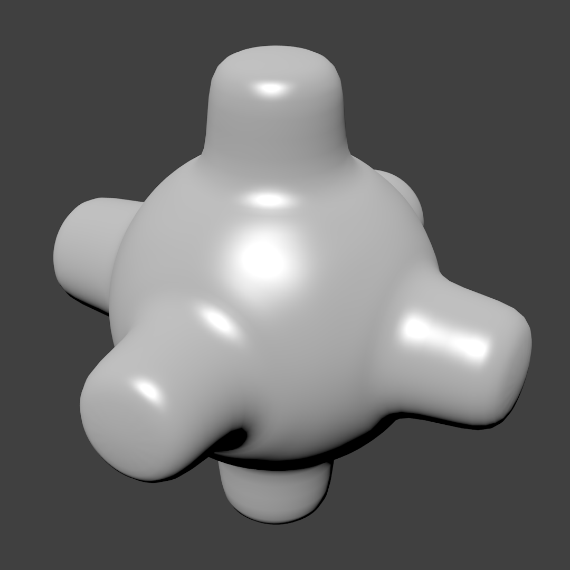
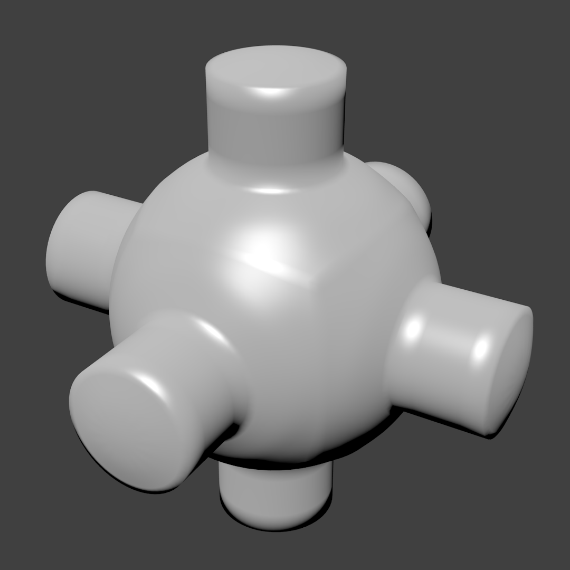
Smooth Shading
Reference
Reference
Shading buttons in Tool Shelf.
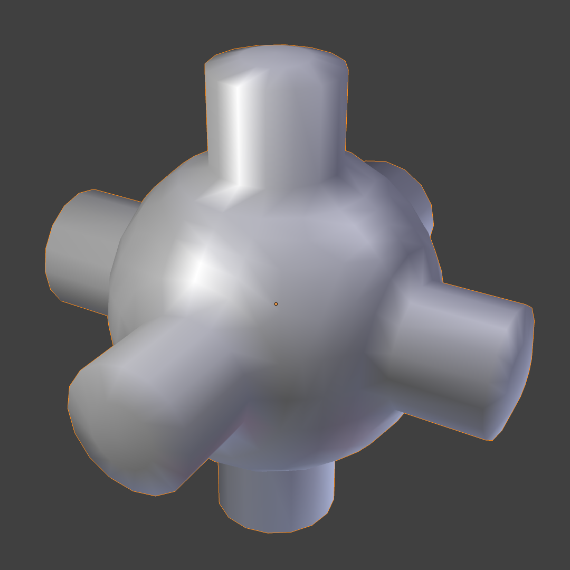
Same mesh smooth shaded.
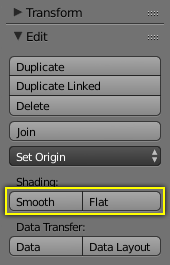
The easiest way is to set an entire object as smooth or faceted by selecting a mesh object, and in Object Mode, click Smooth in the Tool Shelf. This button does not stay pressed; it forces the assignment of the “smoothing” attribute to each face in the mesh, including when you add or delete geometry.
Notice that the outline of the object is still strongly faceted. Activating the smoothing features does not actually modify the object’s geometry; it changes the way the shading is calculated across the surfaces (normals will be interpolated), giving the illusion of a smooth surface.
Click the Flat button in the Tool Shelf ‘s Shading panel to revert the shading back (normals will be constant) to that shown in the first image above.
Smoothing Parts of a Mesh
Alternatively, you can choose which edges to smooth by entering Edit Mode, then selecting some faces and clicking the Smooth button. The selected edges are marked in yellow.
When the mesh is in Edit Mode, only the selected edges will receive the “smoothing” attribute. You can set edges as flat (removing the “smoothing” attribute) in the same way by selecting edges and clicking the Flat button.
Auto Smooth
Reference
|
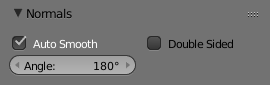
Normals panel with Auto Smooth enabled. |
It can be difficult to create certain combinations of smooth and solid faces using the above
techniques alone. Though there are workarounds
(such as splitting off sets of faces by selecting them and pressing Y),
there is an easier way to combine smooth and solid faces, by using Auto Smooth.
Auto smoothing can be enabled in the mesh tab in the Properties Editor in the Normals panel.
Edge Split Modifier
With the Edge Split Modifier a result similar to Auto Smooth can be achieved with the ability to choose which edges should be split, based on angle. Those Angles are marked as sharp.
|
Edge Split Modifier enabled, based on angle. |
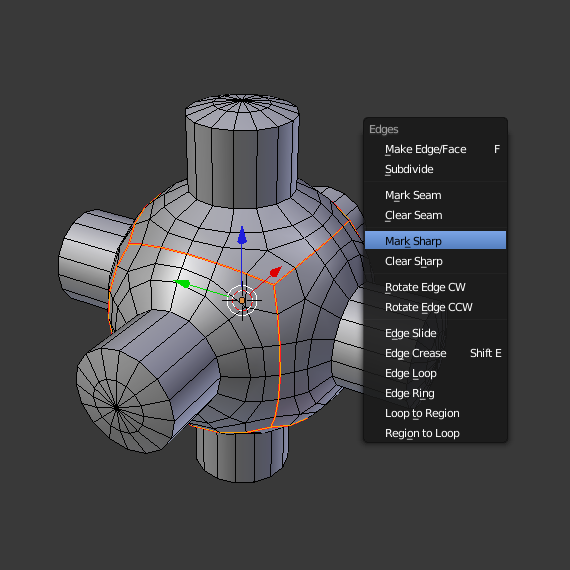
Edges marked as sharp. |

Resulting render with sharp edge weighting. |
Smoothing the Mesh Geometry
The above techniques do not alter the mesh itself, only the way it is displayed and rendered. Instead of just making the mesh look like a smooth surface, you can also physically smooth the geometry of the mesh with these tools:
Mesh Editing Tools
You can apply one of the following in Edit Mode:
- Smooth
- This relaxes selected components, resulting in a smoother mesh.
- Laplacian Smooth
- Smooths geometry by offers controls for better preserving larger details.
- Subdivide Smooth
- Adjusting the smooth parameter after using the subdivide tool results in a more organic shape. This is similar to using the Subdivision Surface Modifier.
- Bevel
- This Bevels selected edged, causing sharp edges to be flattened.
Modifiers
Alternatively, you can smooth the mesh non-destructively with one or several of the following modifiers:
- Smooth Modifier
- Works like the Smooth tool in Edit Mode; can be applied to specific parts of the mesh using vertex groups.
- Laplactian Smooth Modifier
- Works like the Laplacian Smooth tool in Edit Mode; can be applied to specific parts of the mesh using vertex groups.
- Bevel Modifier
- Works like the Bevel tool in Edit Mode; Bevel can be set to work on an angle threshold, or on edge weight values.
- Subdivision Surface Modifier
- Catmull-Clark subdivision produces smooth results. Sharp edges can be defined with subdivision creases or by setting certain edges to “sharp” and adding an Edge Split Modifier (set to From Marked As Sharp) before the Subdivision Surface Modifier.
Subdivision Surface. |
Using creased edges, and resulting subdivision artifacts. |
|
Extra edge loops added. |
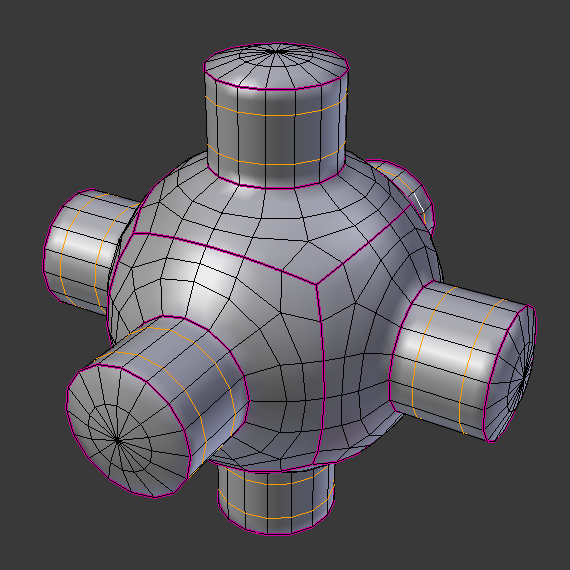
3D View showing creased edges (pink) and added edges loops (yellow). |