Deleting and Dissolving
Reference
These tools can be used to remove components.
Delete
Reference
X, DeleteDeletes selected vertices, edges, or faces. This operation can also be limited to:
- Vertices
- Delete all vertices in current selection, removing any faces or edges they are connected to.
- Edges
- Deletes any edges in the current selection. Removes any faces that the edge shares with it.
- Faces
- Removes any faces in current selection.
- Only Edges & Faces
- Limits the operation to only selected edges and adjacent faces.
- Only Faces
- Removes faces, but edges within face selection are retained.
Dissolve & Limited Dissolve
Dissolve operations are also accessed from the delete menu. Dissolve will remove the geometry and fill in the surrounding geometry. Instead of removing the geometry, which may leave holes that you have to fill in again,
Dissolve
Reference
Ctrl-XRemoves selected geometry, but without creating holes, effectively turning the selection into a single n-gon. Dissolve works slightly different based on if you have edges, faces or vertices selected. You can add detail where you need it, or quickly remove it where you do not.
- Dissolve Vertices
- ToDo.
- Face Split
When dissolving vertices into surrounding faces, you can often end up with very large, uneven n-gons. The face split option limits dissolve to only use the corners of the faces connected to the vertex.
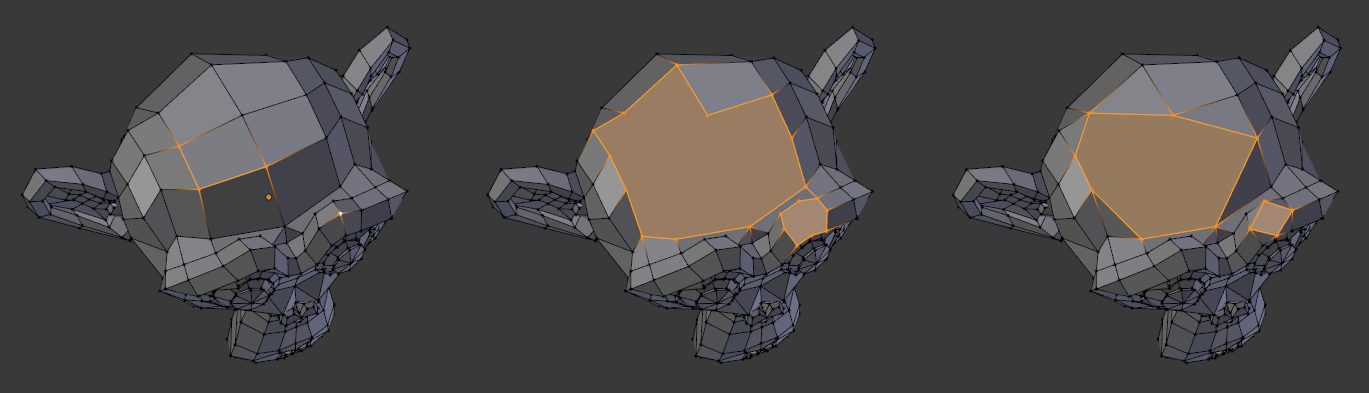
Dissolve Face Split option.
Left: the input, middle: regular dissolve, right: Face Split enabled.- Tear Boundaries
- ToDo.
Examples
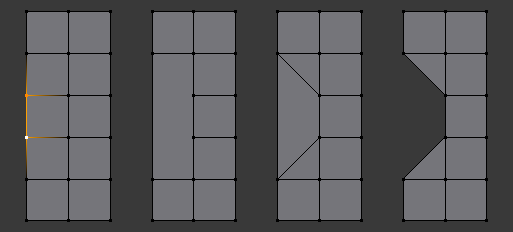
1) Original mesh 2) Face Split: Off, Tear Boundaries: Off 3) Face Split: On, Tear Boundaries: Off 4) Face Split: On/Off, Tear Boundaries: On
Limited Dissolve
Limits the dissolve on selected vertices and/or edges not touching a hole.
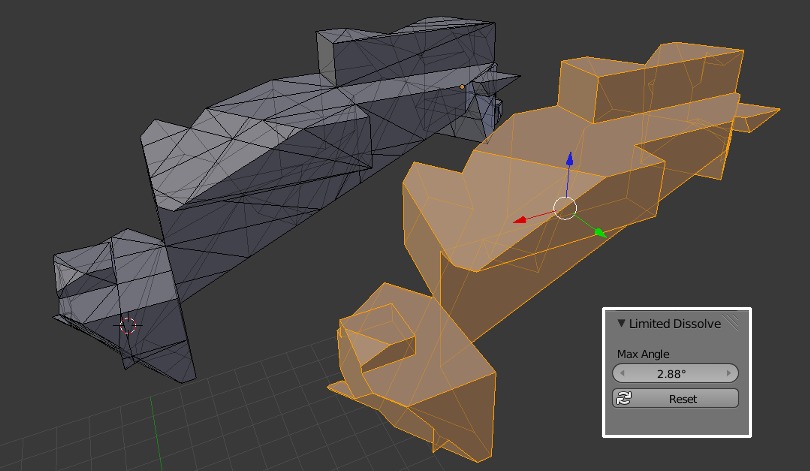
Example showing the how Limited Dissolve can be used.
- Max Angle
- Reduces detail on planar faces and linear edges with an adjustable angle threshold.
- All Boundaries
- ToDo.
- Delimit
- ToDo.
Edge Collapse
Reference
Alt-M, Merges each edge into single vertices. This is useful for taking a ring of edges and collapsing it, removing the face loop it ran through.

Selected Edge Ring. |
Edge Ring Collapsed. |
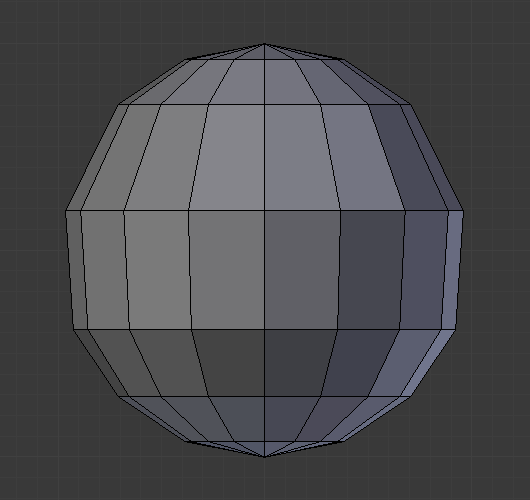
Edge Loop
Reference
X or Delete, Edge Loop allows you to delete a selected edge loop if it is between two other edge loops. This will create one face-loop where two previously existed.
Note
The Edge Loop option is very different to the Edges option, even if you use it on edges that look like an edge loop. Deleting an edge loop merges the surrounding faces together to preserve the surface of the mesh. By deleting a chain of edges, the edges are removed, deleting the surrounding faces as well. This will leave holes in the mesh where the faces once were.
Example
The selected edge loop on the UV Sphere has been deleted and the faces have been merged with the surrounding edges. If the edges had been deleted by choosing Edges from the (Erase menu) there would be an empty band of deleted faces all the way around the sphere instead.

Selected Edge Loop. |
Edge Loop Deleted. |
See also